Views: 0 Author: Site Editor Publish Time: 2026-10-21 Origin: Site
You are cruising down the highway at 65 mph. Suddenly, a violent shudder transfers from your roof straight into the steering wheel. Many overland enthusiasts invest heavily in a premium rooftop tent for their off-grid adventures, only to experience terrifying wind noise, floor sagging, or high-speed instability. The culprit is rarely the gear itself. Campers frequently ignore a critical mechanical detail: the physical distance between their mounting bars.
Focusing entirely on polyester, polycotton, or oxford cloth materials, standard sponge mattress thickness, or the maximum weight limit of a roof rack is a common oversight. Poor mounting geometry causes severe roof damage, critical safety risks, and can easily ruin an otherwise perfect camping trip. Finding the exact sweet spot for your setup is a delicate mix of basic physics and strict engineering guidelines. In this comprehensive technical guide, we will break down the exact mechanical forces at play, detail the required measurements, and show you how to properly secure your rig for maximum stability.
The Golden Rule: The ideal mounting distance for most standard setups falls between 28 and 32 inches, depending heavily on the specific model and your vehicle roofline.
Physics Matter: Alignments that are too narrow create a dangerous seesaw leverage effect. Placing the bars too wide causes the floor panel to sag under human weight.
Structural Variations: Different designs dictate how much flex the base can handle. Hard shells and soft shells require entirely different support strategies.
Weight Distribution: Correct alignment ensures that your rack load capacities, both while in motion and parked, are evenly channeled through the strongest pillars of the vehicle.
More Is Not Always Better: Adding a third support bar seems like a logical upgrade. However, it can induce severe base cracking if your vehicle roof features an aerodynamic curve.
The overlanding sector is currently experiencing a massive shift toward low-profile, aerodynamic rack systems and lightweight extruded aluminum components. As modern vehicles become more fuel-efficient, automotive manufacturers are utilizing thinner roof sheet metal to reduce gross vehicle weight. Consequently, the margin for error when mounting heavy accessories has practically vanished.
Ten years ago, a steel roof could handle sloppy mounting geometry. Today, precise mounting spacing is no longer just a recommendation. It has become a strict mechanical necessity to prevent localized roof deformation and maximize aerodynamic efficiency. Engineers now design rooftop tents with the assumption that the end-user will mount them perfectly.
When evaluating overland gear, it is easy to get lost in the specifications of the rooftop tent itself. The literal foundation of your setup dictates how safely that rooftop tent operates in the real world. Understanding the mechanical forces applied to your vehicle is essential for long-term safety.
Vehicle dynamics involve constant, violent shifts in kinetic energy. You are dealing with rapid acceleration, hard braking, and lateral cornering forces. When load bars are mounted too close together, they fail to support the outer extremities of the rooftop tent. This creates a mechanical leverage effect, operating exactly like a playground seesaw.
Imagine hitting a sudden pothole or braking aggressively at highway speeds. The unsupported front overhang pulls violently upward on the rear bar while driving a massive downward force into the front bar. This multiplied kinetic energy places immense stress on your rack towers. Over time, this narrow configuration risks shearing the mounting bolts or tearing the rack directly from the factory channels. Proper alignment neutralizes this leverage by anchoring the load closer to its edges.
In contrast, positioning your supports too far apart introduces an entirely different structural threat. Most base panels are constructed from aluminum honeycomb or welded internal frames. These materials are exceptionally strong, yet they require adequate central reinforcement to bear concentrated loads.
If the span between the bars is too wide, the center of the floor is left vulnerable. When two adults climb inside and kneel on the mattress, their combined weight causes the aluminum base to bow inward. Repeated flexing compromises the structural integrity of the panel. Over months of rugged use, this sagging can permanently bend the internal frame, misalign critical hinges, and invite water leaks through micro-fractures in the base material.
Driving at highway speeds forces a massive volume of air between the vehicle roof and the bottom of the rooftop tent. This creates aerodynamic drag and a powerful updraft, commonly referred to as wind lift.
If the front support is positioned too far back, the overhanging section catches this updraft like a parachute. The wind acts as a wedge, pushing the front section upward. This results in severe vibrations, deafening wind noise in the cabin, and a noticeable decrease in fuel efficiency. Correct positioning anchors the front section securely. This minimizes the surface area vulnerable to updrafts and stabilizes the entire load against highway-speed winds.
Industry standards and engineering guidelines provide specific measurement ranges to ensure safety and stability. While you should always defer to your specific manufacturer manual, there are objective baseline numbers that apply to the vast majority of overland builds.
To prevent the dreaded leverage effect and eliminate floor sag, your mounting dimensions must fall within a strict operational window.
Minimum Spacing 24 to 26 inches: Anything less than this severely compromises overhang stability. You run a high risk of bolt shearing during hard braking or off-road descents.
The Sweet Spot 28 to 32 inches: This is the optimal balance. It prevents aerodynamic lift, eliminates floor bowing, and distributes weight evenly into the structural pillars of the vehicle.
Maximum Spacing 36 to 40 inches: Exceeding this distance removes vital mid-section support. You face a high risk of floor bowing, hinge damage, and structural fatigue.
The 28 to 32-inch range is widely celebrated because it aligns perfectly with the load-bearing B and C pillars of most modern SUVs and trucks. This transfers the weight directly to the strongest parts of the vehicle frame.
Precision is critical when configuring your roof rack. Do not just eyeball the distance. Measurements must be empirical.
First, locate the exact center point of your front load bar. Using a calibrated measuring tape, pull a straight line directly to the exact center point of your rear load bar. This center-to-center measurement is your true spacing. Furthermore, ensure that the front bar is positioned far enough forward to support the front third of the unit, effectively neutralizing aerodynamic lift before it starts.
Not all rooftop tents are engineered with the same structural logic. The materials, opening mechanisms, and base designs vary significantly across the market. Identifying your specific rooftop tent category is the crucial first step in determining how critical your measurement tolerances truly are.
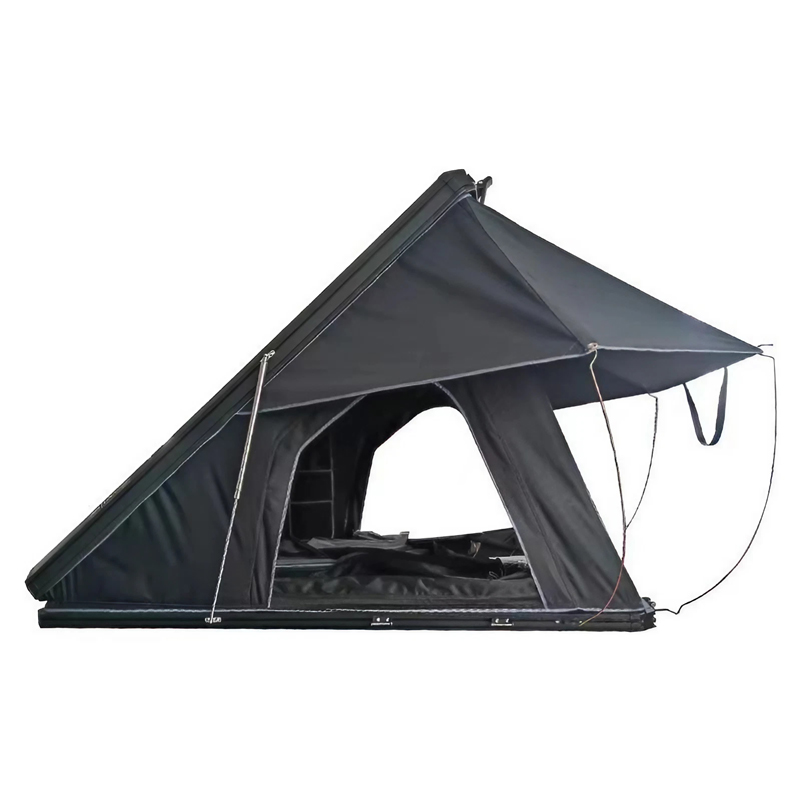
A hard shell rooftop tent features a rigid outer casing. High-quality Maitop models typically utilize thick aluminum honeycomb panels, designed to comfortably sleep 2 to 4 people (often ideal for families of 2 adults and 1 child, or up to 2 adults and 2 children) while resisting harsh weather. The clamshell mechanism opens diagonally on one side, and does not expand horizontally. Rapid opening of the main body generally takes just 30–60 seconds, though arranging the ladder, rainfly, and any annex room for rooftop tent will require additional time. Inside, these models are typically equipped with a standard sponge mattress around 5 cm thick, depending on the model. Because this outer shell acts as a structural exoskeleton, these models are generally stiffer and more forgiving than their fabric counterparts.
However, they are highly sensitive to twisting forces. If the supports are uneven or spaced too far apart, the rigid base can warp under the dynamic load of off-road driving. Even a warp of just a few millimeters can misalign the locking mechanisms. If you find that the stainless steel latches on your clamshell are suddenly difficult to close, incorrect alignment is likely causing the base to flex out of its factory shape.
Folding fabric models operate on a side-open fold-out mechanism, essentially doubling their footprint when deployed sideways over the vehicle. A premium soft shell rooftop tent relies primarily on polyester fabric, though some models utilize polycotton or oxford cloth, comfortably sleeping 2 to 4 people. The primary reason for choosing a soft shell should revolve around maximizing space for the required number of occupants. Opening the main body takes about 3–5 minutes, not including the extra time needed to set up the ladder, rainfly, and an annex room for rooftop tent. These units typically feature a standard sponge mattress around 4–4.5 cm thick. They rely heavily on a central hinge and an internal aluminum skeleton to maintain their shape.
Spacing is exceptionally critical here. If the load bars are placed too wide, the unsupported center section places immense shear stress on the deployment hinge when occupants move around inside. Over time, this localized stress can bend the hinge pins or cause the folding floor to sit unevenly. Because they lack a rigid outer shell to distribute force, these folding units require strict adherence to the 28 to 32-inch rule to support the main floor section safely.
Vertical elevation models lift on all four corners simultaneously. A modern pop up rooftop tent utilizes internal gas struts and an aluminum honeycomb shell to create a massive interior living space suitable for 2 to 4 people (such as 2 adults and 1 or 2 children). The pop-up design rises vertically and cannot expand horizontally. Deploying the main structure is quick, taking roughly 30–60 seconds, while deploying the ladder, rainfly, and annex room for rooftop tent adds a bit more time. They usually include a standard sponge mattress around 5 cm thick. For this intricate lifting system to operate smoothly, the base must remain perfectly flat at all times.
If the supports are too narrow, the heavy ends of the unit can droop slightly over the bars. This micro-droop binds the internal tracks of the gas struts. If you notice that one corner is lagging or getting stuck during deployment, it is almost always a symptom of an unsupported base caused by improper placement. Perfectly balanced support ensures the struts can push upward linearly without mechanical friction.
Tent Type | Structural Base | Spacing Tolerance | Primary Risk of Poor Spacing |
|---|---|---|---|
Hard Shell | Aluminum Honeycomb / Stamped Aluminum | Low to Medium | Latch misalignment, shell cracking |
Soft Shell | Internal Aluminum Frame | Extremely Low | Hinge failure, severe floor sagging |
Pop-Up | Flat Rigid Floor | Low | Gas strut binding, lifting friction |
One of the most misunderstood concepts in overland vehicle builds is how weight limits interact with mounting geometry. The distance between your supports directly influences how kinetic and resting forces are applied to your vehicle roof.
Dynamic weight capacity refers to the absolute maximum load your vehicle roof and rack system can safely carry while in motion. This accounts for the multiplied forces of wind resistance, high-speed cornering, and the harsh impacts of off-road trails. For most consumer vehicles, this limit hovers between 150 lbs and 165 lbs.
Proper alignment is vital for maintaining dynamic safety. If the distance is too narrow, the rooftop tent acts as a force multiplier. Hitting a bump at 40 mph with a poorly supported load multiplies the dynamic force on the rear mounting brackets. This easily exceeds the engineering limits of the rack and can potentially dent the sheet metal of the vehicle.
Static weight capacity is the maximum load the roof can support when the vehicle is completely parked and turned off. This includes the weight of the rooftop tent, your sleeping gear, and the human occupants inside. This combined weight often totals a massive 400 to 600 lbs.
While parked, your vehicle roof is an absolute fortress. However, that strength assumes the weight is distributed properly. Correct alignment ensures that this massive static load is channeled straight down through the A, B, and C pillars rather than resting on the weaker, unsupported center expanse of the roof. Before moving the vehicle, the rooftop tent must always be fully closed and secured; however, it generally does not need to be uninstalled from the roof. When selecting your gear, always verify the dynamic load, static load, and crossbar compatibility to determine if you need to replace your original factory crossbars based on actual specifications.
When configuring a rig for off-grid travel, consumers generally choose between two primary mounting systems. Understanding the mechanical implications of each system is necessary for a stable, long-lasting build.
Standard aftermarket systems often utilize a simple two-bar configuration attached to factory side rails or rain gutters.
The primary advantage here is efficiency. This setup is lighter, more cost-effective, and generally produces far less aerodynamic drag and wind noise. There is a very small margin for error, though. You must hit the 28 to 32-inch sweet spot precisely. Precise alignment on a two-bar system is non-negotiable, as all the dynamic and static weight is concentrated on just two points of contact. A high-quality two-bar setup is perfectly safe, provided the bars have a high dynamic weight rating and the measurements are flawlessly executed.
Platform racks feature a flat aluminum tray with multiple integrated slats or a grid system. This design spreads the load across a massive surface area.
These systems offer ultimate weight distribution and completely eliminate any risk of floor sag, as the base is supported across its entire length. In contrast, they are heavier, more expensive, and introduce a unique challenge known as the curved roof problem. Many vehicle roofs feature a slight aerodynamic bow. If the platform rack follows this curve, the middle slats may sit slightly higher than the front and rear slats. When you bolt a perfectly flat base to this convex surface, it creates a hard pivot point in the center. Tightening the hardware over this fulcrum can easily crack the base. If using a platform, you must verify with a level that the mounting surface is perfectly planar.
If you have already mounted your gear and hit the trails, you should perform routine physical inspections. The structure will provide clear, undeniable feedback if the geometry is wrong. Recognizing these signs early can save your equipment.
The most immediate indicator of an issue is a noticeable dip or valley in the mattress. When you climb inside and kneel near the center, the floor should feel rigid and fully supported. If you experience a trampoline-like flex, your supports are too far apart. The aluminum base is bowing under your static weight. This requires immediate adjustment to prevent permanent frame damage.
All roof-mounted accessories generate some level of aerodynamic drag. However, violent chattering, loud humming, or feeling the steering wheel vibrate at 60 mph indicates a severe aerodynamic flaw. Usually, this means the front support is too far back. This allows wind to catch the front overhang and lift the unit like a sail.
Alignment is paramount for rigid models. If the latches suddenly require excessive force to close, or if the rubber weather seals do not align perfectly when shutting the shell, the base is undergoing torsional twist. This warping is frequently caused by supports that are spaced too narrowly or are not level with one another.
Mounting heavy equipment to a vehicle requires methodical execution. Do not rush this process. Follow this objective checklist to ensure absolute structural stability before your next trip.
Before lifting anything onto your vehicle, gather the necessary equipment. Do not attempt to improvise tools during the installation process. This often leads to stripped bolts or scratched paint.
A calibrated measuring tape for precise calculations.
The manufacturer-supplied mounting brackets and specialized nylon-insert lock nuts.
A torque wrench to avoid over-tightening bolts, which can crush the base tracks.
A mechanical garage hoist, or at least two strong assistants for the heavy lifting.
Achieving the perfect geometry requires careful adjustment before the hardware is fully secured. Follow these sequential phases to ensure empirical accuracy.
Loosening the Framework: Do not lock your rack into its final position yet. Leave the tower bolts slightly loose so the bars can slide freely along the roof rails.
Lifting and Centering: Carefully hoist the unit onto the roof. Ensure it is perfectly centered laterally from side to side so the weight is distributed evenly across the vehicle suspension. Never drag the unit across the bars. Doing so will damage the mounting tracks.
Dialing in the Geometry: Slide the front and rear bars until they hit the 28 to 32-inch sweet spot. Measure center-to-center. Ensure the unit is positioned far enough back so it does not overhang the windshield excessively, but far enough forward so the rear liftgate can open completely without striking the shell.
Torquing and Testing: Hand-tighten all mounting hardware first to ensure proper thread seating. Then, use your torque wrench to secure the bolts to the specified rating. Finally, perform a rigorous shake test. Grab the side of the closed shell and pull firmly. The entire vehicle should rock on its suspension. The rooftop tent itself should not shift, rattle, or slide independently of the roof rack.
Upgrading your overland rig with a premium rooftop tent is a major investment in your outdoor lifestyle. Its performance, safety, and longevity rely entirely on a solid, mathematically sound foundation. Taking an extra ten minutes to measure and adjust your mounting geometry is a small price to pay for peace of mind.
This simple, often-overlooked step prevents severe vehicle damage, eliminates annoying wind noise during long highway transits, and guarantees a safe, comfortable night of sleep in the backcountry. Ready to upgrade your off-grid setup? Ensure your foundation is flawless, then explore premium overland gear. Visit Maitop to find the perfect rooftop tent matched exactly to your vehicle specifications and camping needs. Double-check your measurements, torque your bolts correctly, and head off the grid with absolute confidence.
For the vast majority of setups, the ideal distance between crossbars is between 28 and 32 inches, measured from the center of the front bar to the center of the rear bar. This specific range provides optimal support for the floor panel while aligning perfectly with the strongest structural pillars of most vehicles.
Yes. If crossbars are spaced wider than 36 to 40 inches, the center of the tent floor loses vital structural support. When occupants climb inside, this lack of central reinforcement causes the floor to sag and bow, which can permanently damage internal frames and hinges.
Utilizing three supports is mechanically possible and can provide additional floor reinforcement, but it must be executed with extreme caution. Vehicle roofs are rarely perfectly flat; they often feature a slight aerodynamic curve. If you install three bars, the middle bar frequently sits slightly higher than the front and rear ones. Tightening the hardware over this uneven fulcrum will induce severe stress, potentially warping the aluminum frame. You must use a level to verify that all three points are perfectly planar.
Many factory-installed racks feature fixed mounting points that are permanently bolted into specific locations. If your fixed points measure outside the safe operational window, you should not mount a heavy rooftop tent directly to them. Mounting outside the recommended window compromises structural integrity and creates dangerous aerodynamic leverage. The safest solution is to remove the factory bars entirely and upgrade to an aftermarket system that allows for adjustable mounting points.
Spacing does not alter the official, engineered weight limit stated by the manufacturer. If a rack is rated for 165 lbs dynamic weight, that number remains static regardless of where the bars sit. Incorrect alignment drastically alters how that weight is distributed across the vehicle pillars, though. If placed too close together, the concentrated load can overload a specific section of the roof rail, leading to localized failure even if the total weight is technically under the limit.
The foundational standard of 28 to 32 inches applies universally to nearly every model on the market, but the tolerance for error varies significantly depending on the structural design. Rigid models feature bases constructed from aluminum honeycomb panels. This rigidity makes them slightly more forgiving if your measurement is an inch or two wider than recommended. Folding fabric models rely entirely on an internal skeleton and central hinges to support the extended floor. Because they inherently possess more flex, they require strict adherence to the guidelines to prevent the unsupported floor sections from sagging under human weight.